| Nissan Titan | |||||
|
|||||
Kit includes 2 sizes of Tailgate Seal with Taper Seal®: Standard and Large ITEMS REQUIRED: Scissors, clean rag and soap solution. |
|||||
STEP 1 |
|||||
 |
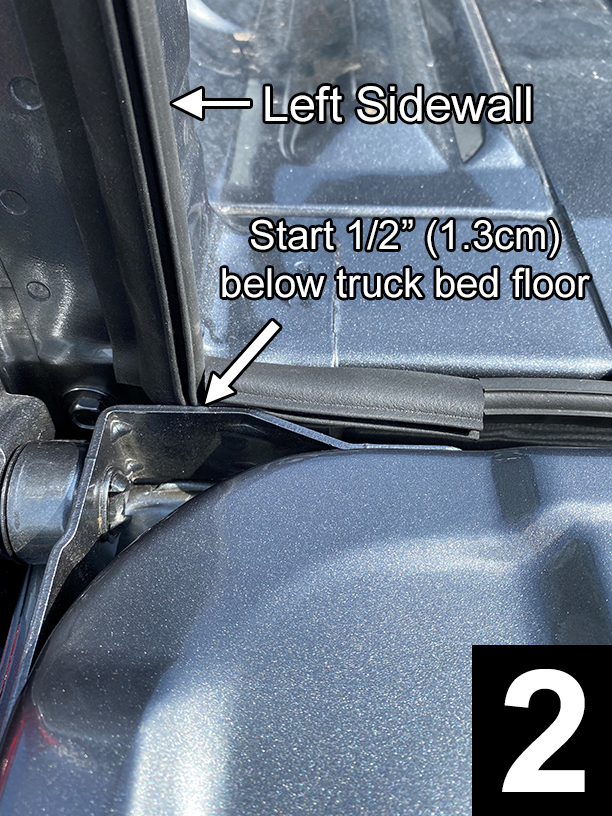
STEP 2: ATTACHING TO LOWER SIDEWALLS Start 1/2” (1.3 cm) below truck bed floor and attach Large Tailgate Seal to the rear corner edge of the left sidewall extension (FIG 2). Stop when flush with rubber stop. Cut to fit. Apply light pressure to adhesive. Duplicate for right sidewall. |
 |
|||
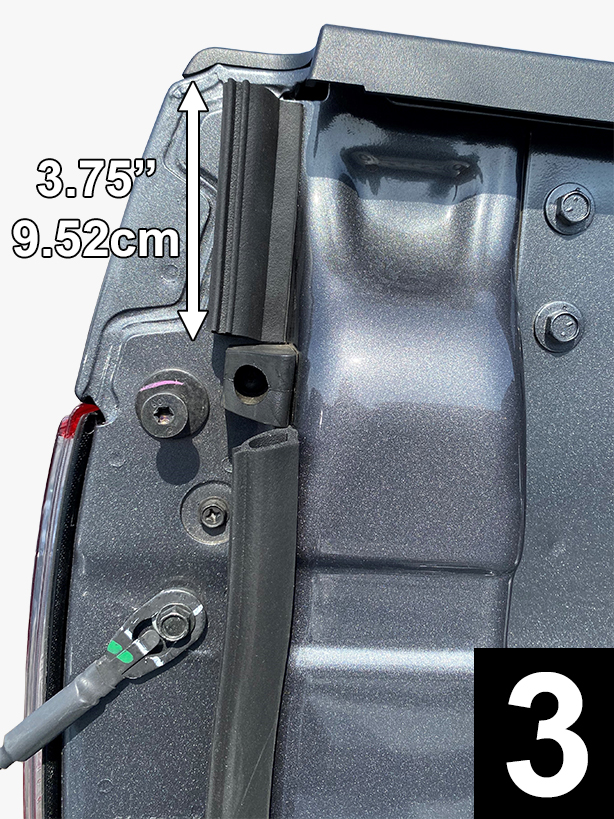 |
STEP 3: ATTACHING 3.75” (9.52cm) PIECE TO UPPER SIDEWALLS Cut a 3.75” (9.52cm) piece from the Large Tailgate Seal and attach just below top of bedrail (FIG 3), bulb side facing outwards. Apply light pressure to adhesive. Check that the top of the tailgate does not interfere with the top of seal by lifting up tailgate (but not closing) and inspecting from the outside rear. Adjust seal as necessary. |
||||
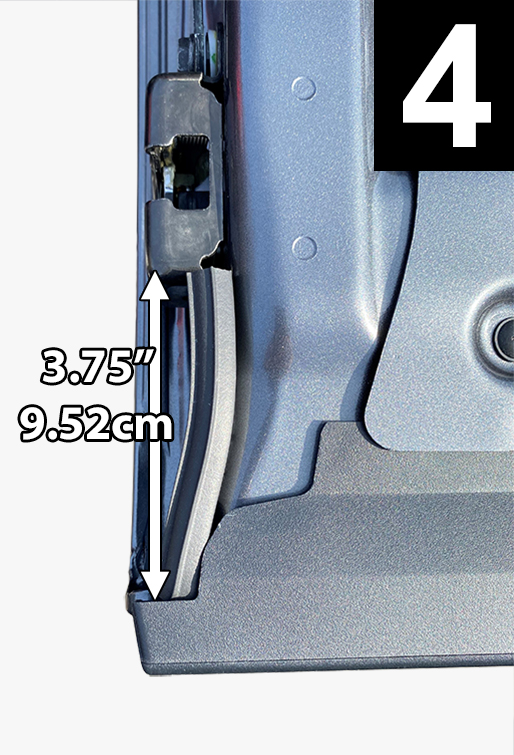 |
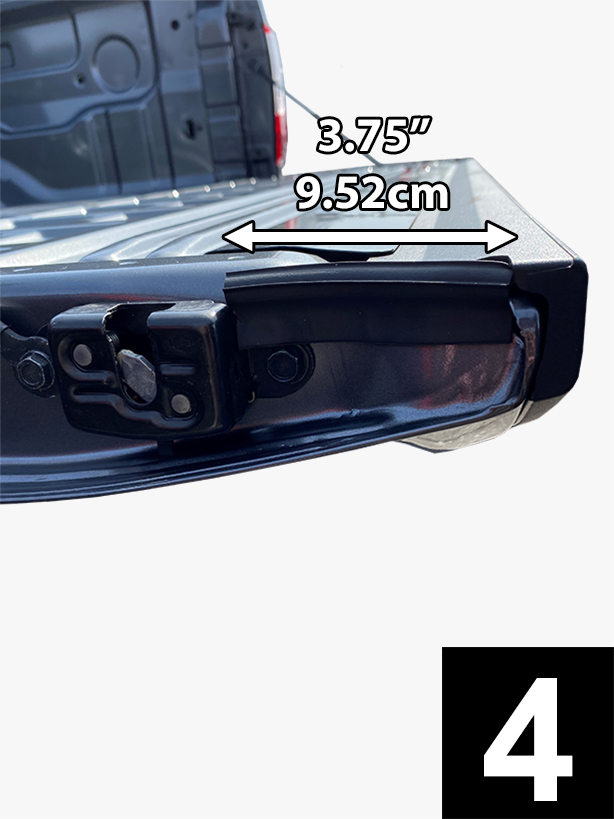
STEP 4: ATTACHING 3.75” (9.52cm) PIECE TO TOP OF TAILGATE Cut and attach a 3.75” (9.52cm) piece of Standard Tailgate Seal to the side of tailgate near the top, bulb side facing upwards (FIG 4). Apply light pressure. Duplicate for the right side. |
|
|||
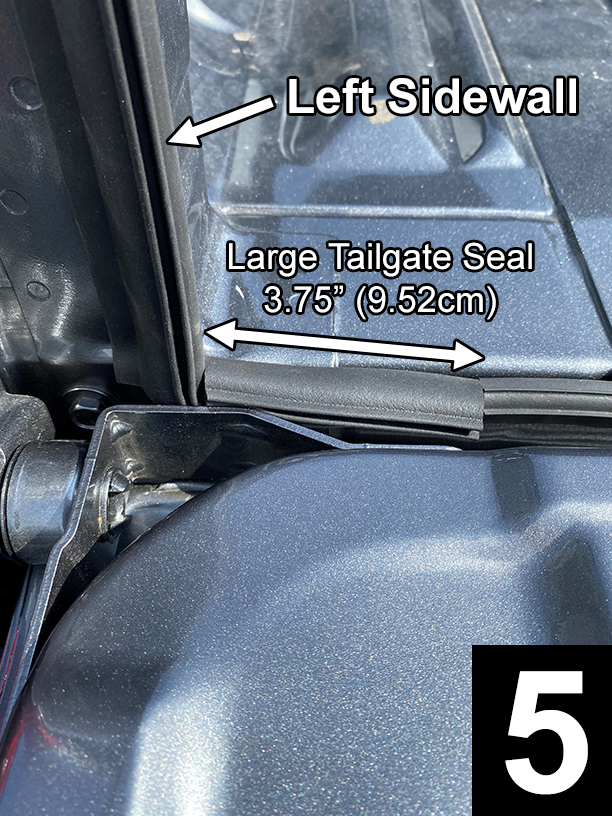 |
STEP 5: ATTACHING 3.75” (9.52cm) to TAILGATE GAP (Left Side Only) Cut a 3.75” (9.52cm) piece from the Large Tailgate Seal and flush to seal on the sidewall while aligning the top of bulb with truck bed floor (FIG 5). Once seal is positioned apply very firm pressure (25lbs.) to secure adhesive bond. |
||||
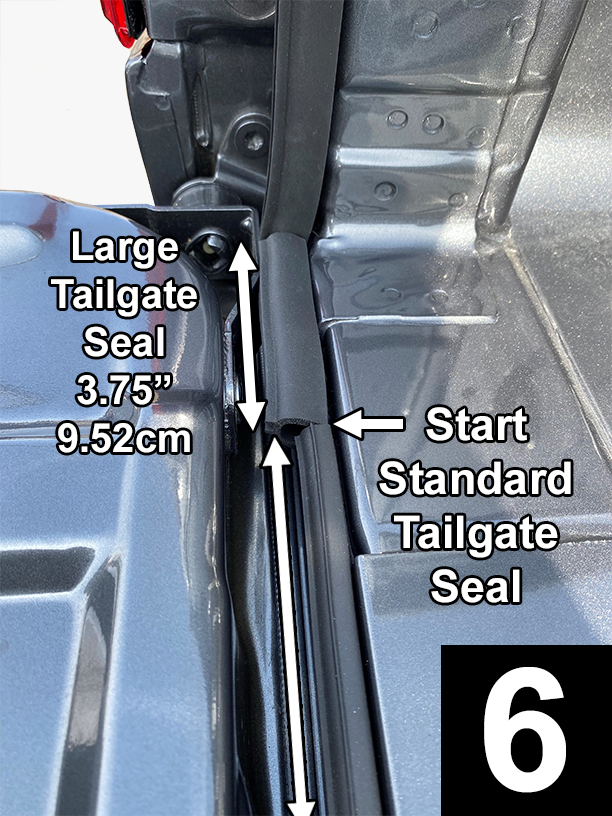 |
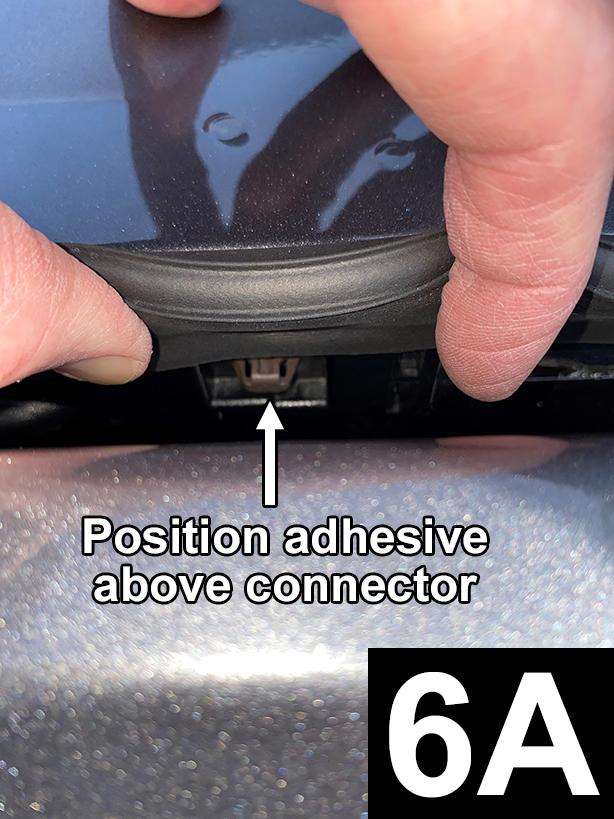
STEP 6: ATTACHING TO TAILGATE GAP continued: Flush Standard Tailgate Seal, bulb side up, to Large Tailgate Seal and adhere to the tailgate gap, aligning the top of bulb with truck bed floor (FIG 6). Peel liner and attach in sections, apply light pressure to adhesive. Flush with seal on right sidewall and cut to fit. Apply very firm pressure to secure adhesive bond. Note: Position adhesive above connector (FIG 6A). |
 |
|||
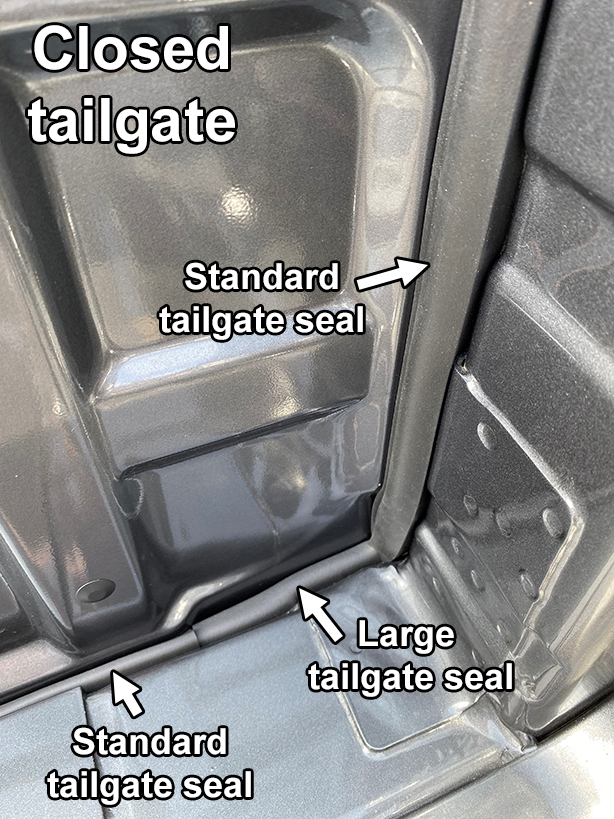
| STEP 7 Close tailgate. If you see light through the sidewalls, make small adjustments by removing the seal and repositioning. If there is still light then cut pieces of seal, as needed, and attach to the sidewalls and/or tailgate. Do not attach adhesive to seal. Open tailgate. |
|||||
| STEP 8 After seal is in place apply very firm pressure (25lbs.) to secure the entire adhesive bond. Leave tailgate open for 30 minutes. If the air temperature will fall below 50°F (10°C) within the next 24 hours or, if applying to a surface other than paint, such as plastic or a spray on bed liner, then leave tailgate open for 24 hours. |
|||||
|
|||||
| Inside view showing left side of tailgate when closed | |||||