ITEMS REQUIRED: Scissors, clean rag and soap solution.
Extreme temperatures will result in poor adhesive performance. Apply only if air and surface temperature is between 55° - 105°F (13° - 40°C).
Avoid touching adhesive after peeling off red liner. Repositioning of seal should not be done more than 3 times and only 1 time if the temperature is above 80°F (13°C).
Click on photo for an enlarged view
| 2019 Ford Ranger | ||
CONTENTS: One roll of seal 9’ (2.74m) length. Two cut pieces of large seal measuring 0.88” (2.2cm) width by 4.50” (11.4cm) length. Two IPA pads. ITEMS REQUIRED: Scissors, clean rag and soap solution. Extreme temperatures will result in poor adhesive performance. Apply only if air and surface temperature is between 55° - 105°F (13° - 40°C). If 45° - 55°F (7° - 13°C), you can use a hair dryer to warm the tape and surface of pickup.1’ (30cm) sections at a time, then apply seal. |
||
   |
STEP 1: STEP 2: |
|
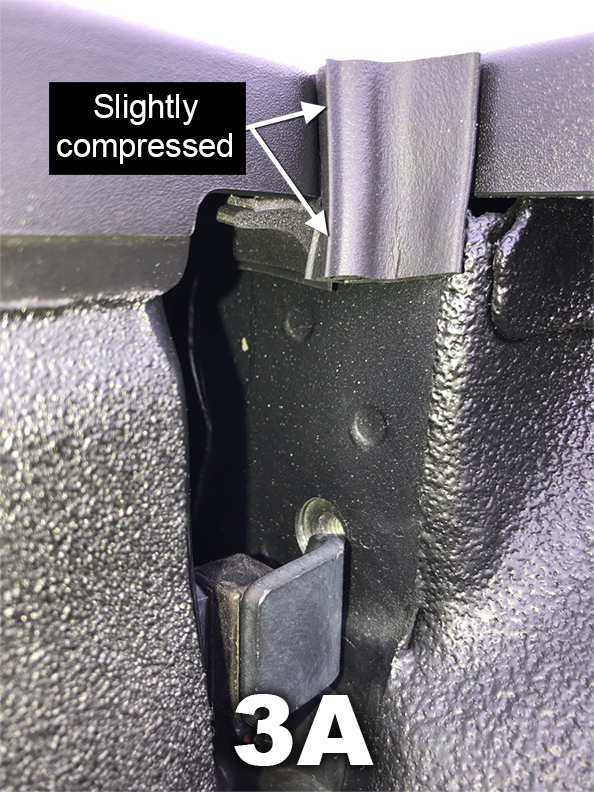 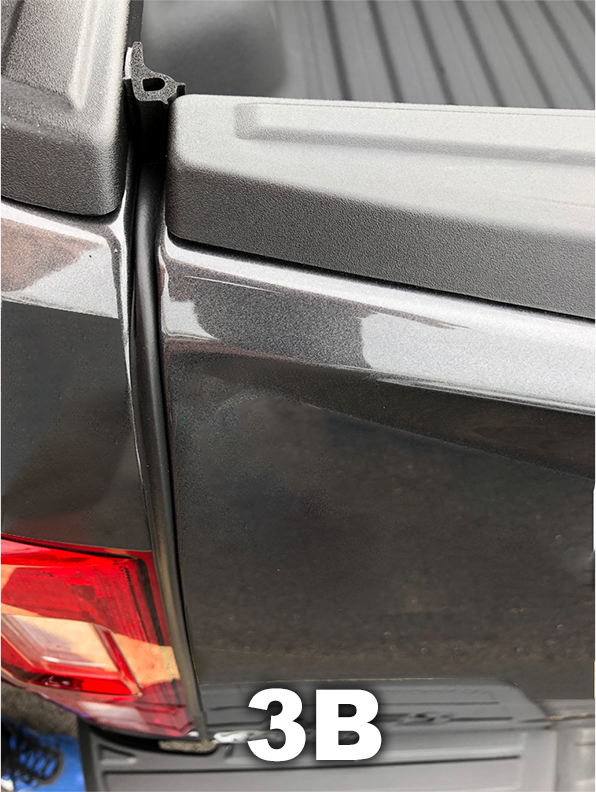 |
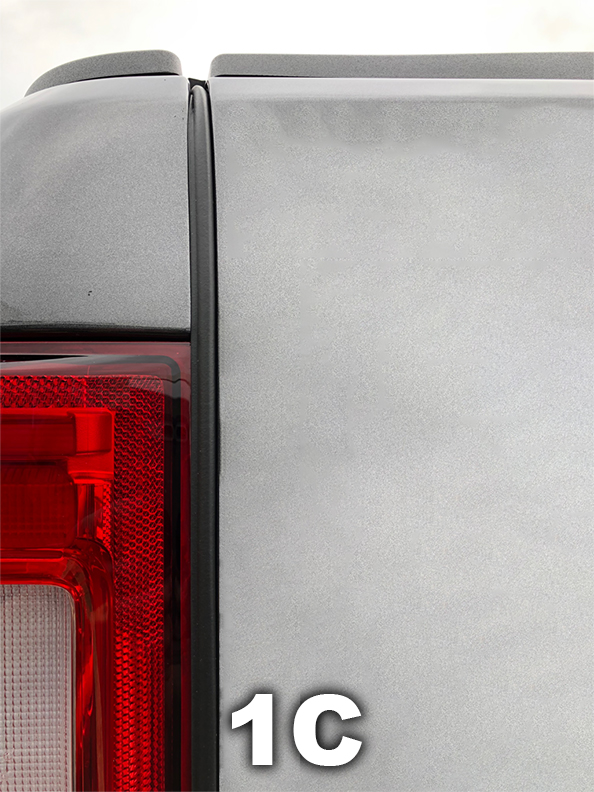
STEP 3: ATTACHING TO SIDEWALL TOP (Left Side) Cut a 1.25” (3.2cm) piece from roll of seal. Close tailgate. Remover adhesive liner. You will be positioning top end of seal to top of sidewall (FIG 3A). Apply lightly to sidewall, bulb side facing out and slightly compress to both the inside top of tailgate and to seal on the inside top of tailgate (FIG 3A inside view) (FIG 3B outside view). Once seal is positioned apply very firm pressure to secure the entire adhesive bond. |
|
|
|
STEP 4: ATTACHING PRE-CUT 4.50” (11.4cm) PIECE TO TAILGATE GAP (Left Side) Remove adhesive liner and flush end of seal to sidewall while aligning the top of bulb with the lower ridge of truck bed floor (FIG 4A). Once seal is positioned apply very firm pressure to secure the entire adhesive bond. |
|
|
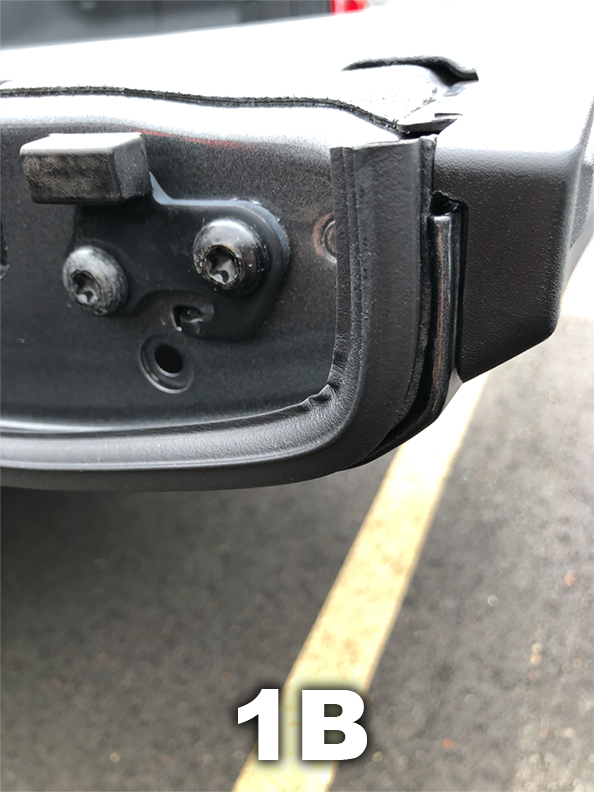
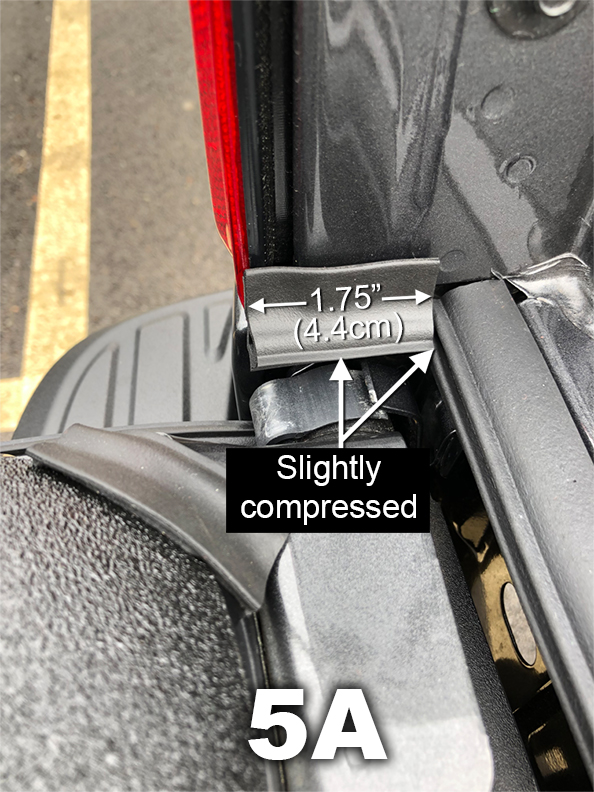
STEP 5: ATTACHING TO SIDEWALL BOTTOM (Left Side) Open tailgate. Cut a 1.75” (4.5cm) piece from roll of seal. Remove adhesive liner. Lightly apply to sidewall, bulb side down slightly compressed to both the top of tailgate hinge and to seal on the tailgate gap (FIG 5A). Once seal is positioned apply very firm pressure to secure the entire adhesive bond. |
|
 |
STEP 6: COVER BRACKET HOLE (Left Side) STEP 7: ATTACHING PRE-CUT 4.50” (11.4cm) PIECE TO TAILGATE GAP (Right Side) |
|
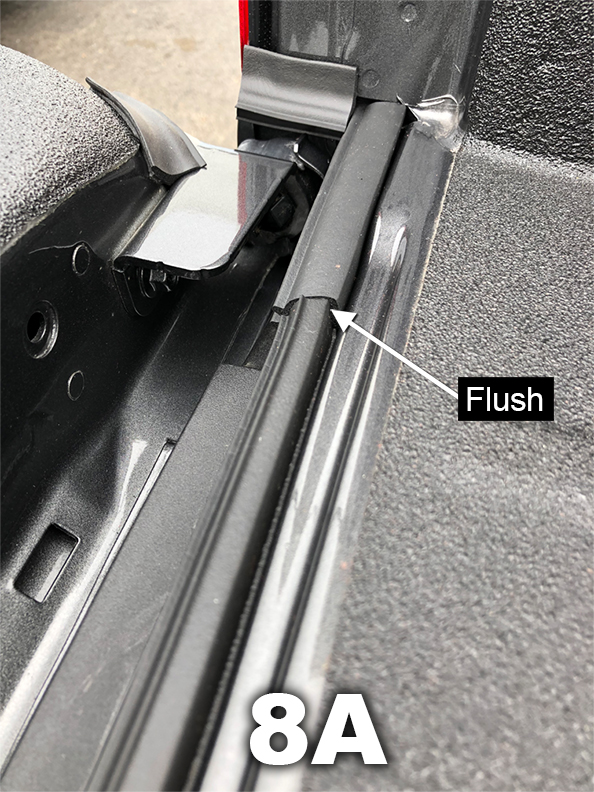 |
STEP 8: ATTACHING TO TAILGATE GAP You will be aligning the top of bulb with truck bed floor and flushing to 4.50” (11.4cm) length seal on the tailgate gap (FIG 8A). Take roll of seal, peel back liner and attach in sections, apply light pressure to adhesive. Flush with 4.50” (11.4cm) length seal on right side of tailgate gap and cut to fit. Close tailgate. If you see light coming through the tailgate gap, then remove and reposition entire seal up or down. Once seal is positioned apply very firm pressure to secure the entire adhesive bond. |
|
| REPEAT STEPS 2, 3 5 AND 6 FOR RIGHT SIDE FINAL STEP: After entire seal is in place, apply very firm pressure again to firmly secure the entire adhesive bond. If air temperature will fall below 55°F (13°C) within the next 24 hours or, if any part of seal is attached to a spray on bed liner, then leave tailgate open for 24 hours. |
||