| How to install Extruded Solutions' Tailgate Seal with Taper Seal® |
|---|
| ITEMS REQUIRED: Scissors, clean rag, and soap-and-water solution.
IMPORTANT: Extreme temperatures can reduce adhesive performance. Install only when air and surface temperatures are between 55°F and 105°F (13°C–40°C). Avoid touching the adhesive after removing the red liner. Reposition the seal no more than twice (or only once when temperatures exceed 80°F / 27°C), as repeated repositioning may reduce adhesive strength. For spray-in bed liners (factory or aftermarket), textured surfaces, plastics, and other difficult-to-bond surfaces, use the enclosed Adhesion Promoter. Adhesion Promoter is not required on clean, smooth painted vehicle surfaces. WARNING: Adhesion Promoter creates an instant bond. Once applied, do not remove, reposition, or readjust the seal. Click on any photo for an enlarged view. |
| Chevrolet Silverado EV with Multi-Flex Tailgate | ||||
|
||||
Enclosed adhesion promoter will only be used for STEP 3 and 4. |
||||
STEP 1 |
||||
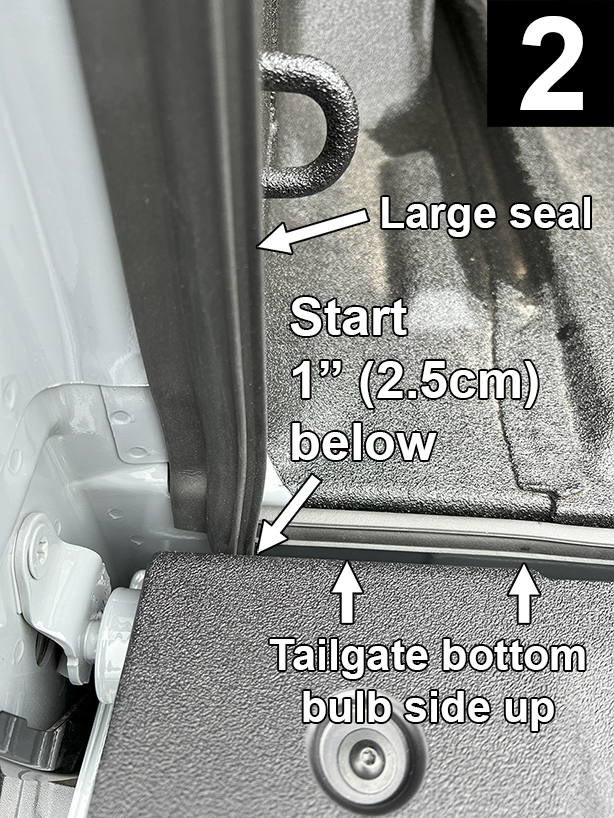
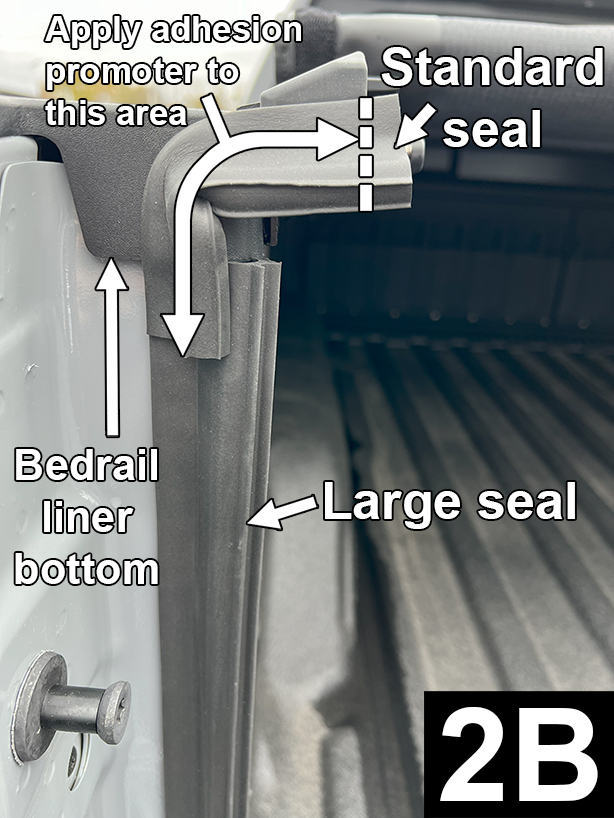
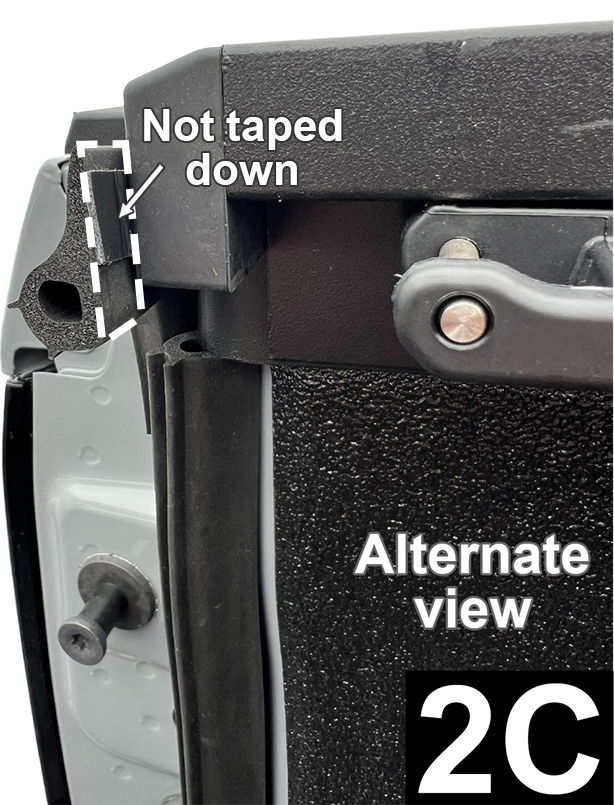
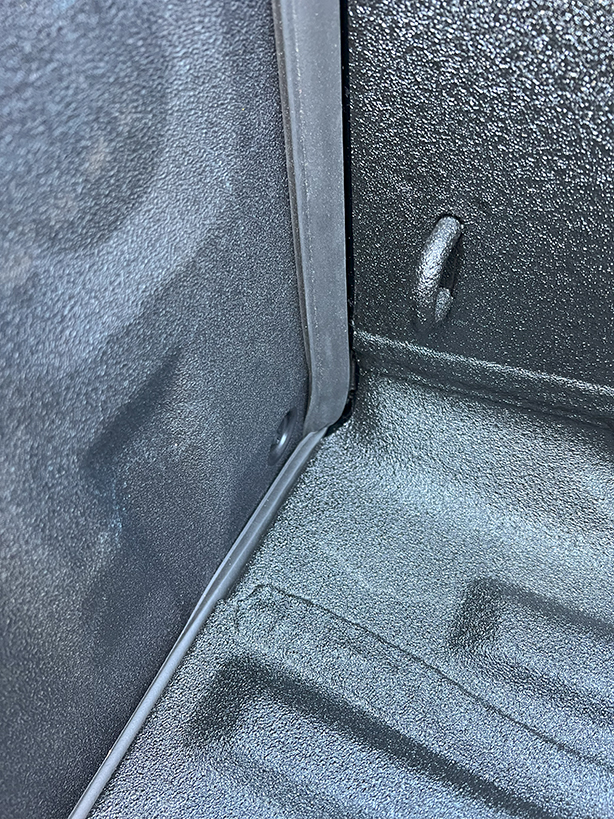
STEP 2: ATTACHING LARGE SEAL TO LEFT SIDEWALL OF MAIN TAILGATE Conform to contours and continue straight up, applying light pressure to adhesive and stop when 6” (15.24cm) from the bottom of bedrail liner. Keeping adhesive off surface, mark the seal where it will be flush to the bottom of bedrail liner (FIG 2B and 2C). Cut, remove liner and apply. Close tailgate. If you see light through the sidewall, make adjustments by removing seal and repositioning. Once seal is positioned apply very firm pressure (25lbs.) to secure adhesive bond. Duplicate for right side. |
||||
![]() |
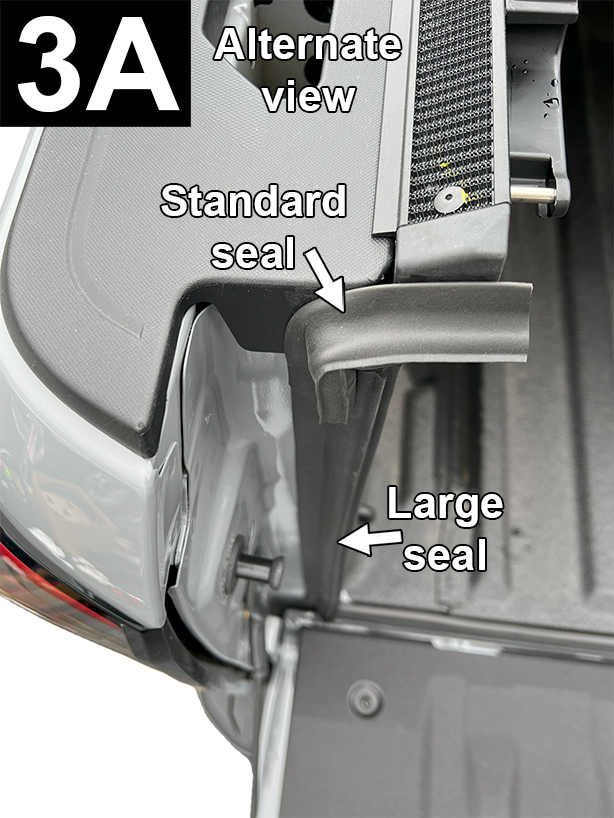
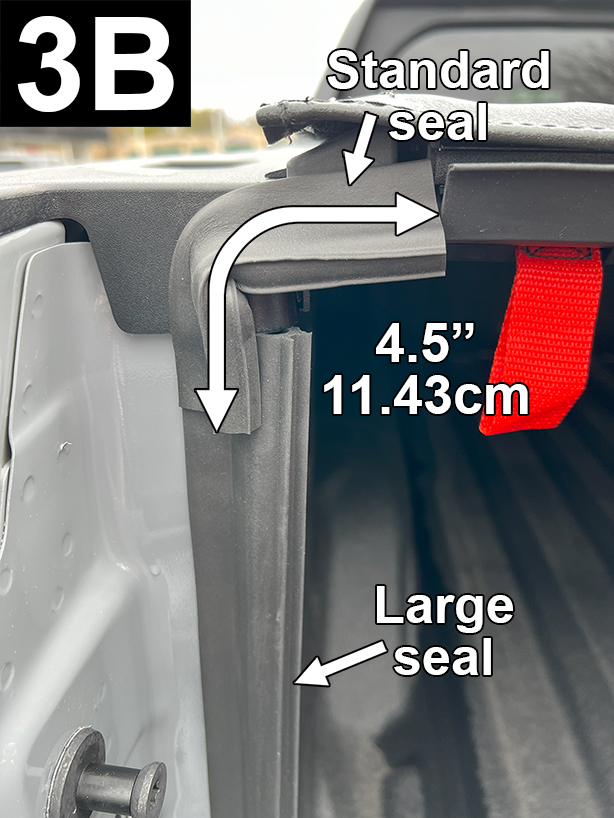
STEP 3: ATTACHING STANDARD SEAL TO TOP OF SIDEWALL |
![]() |
||
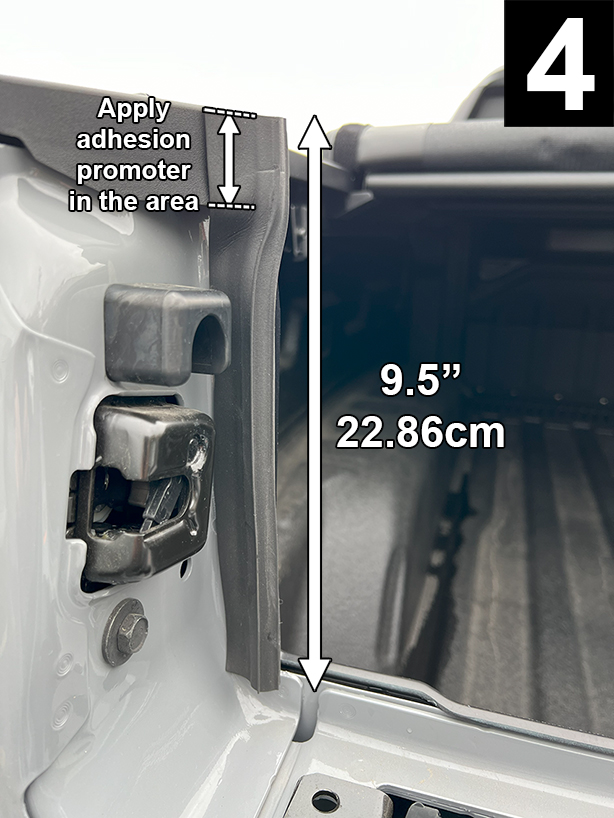
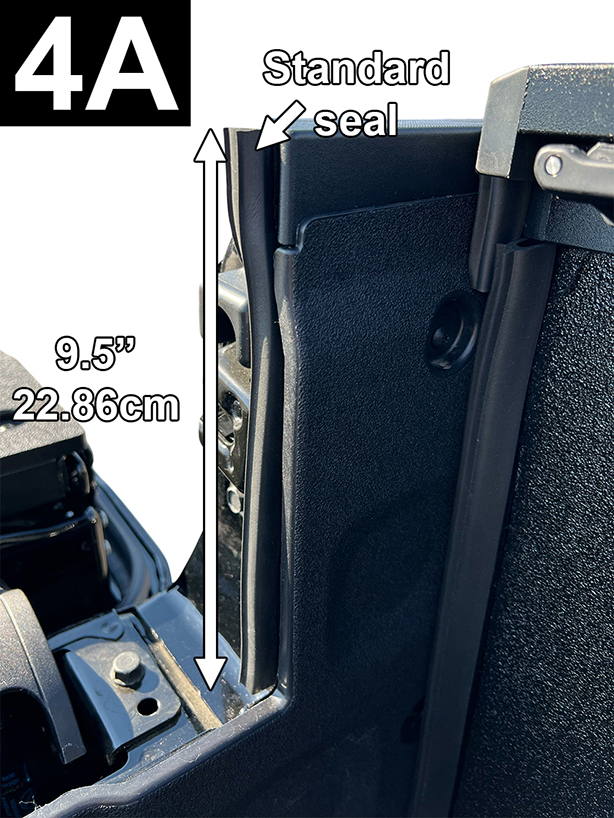
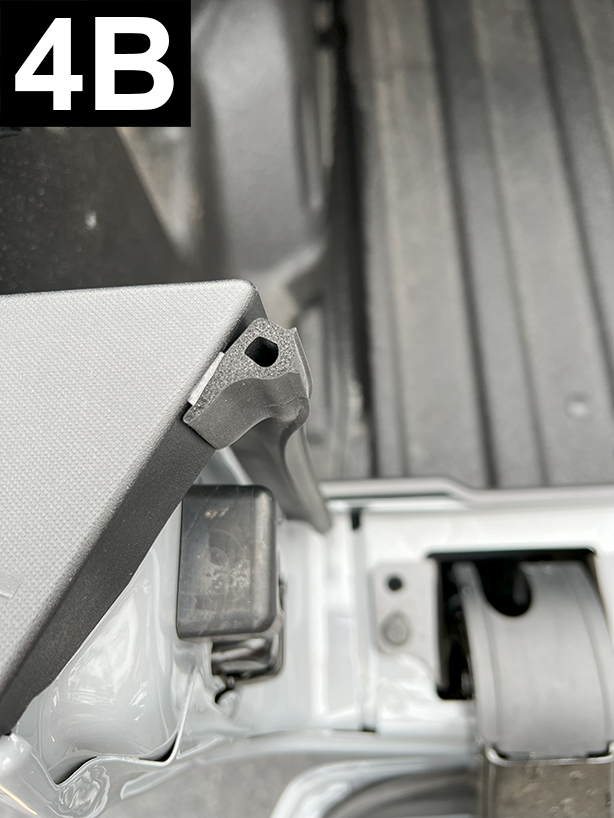
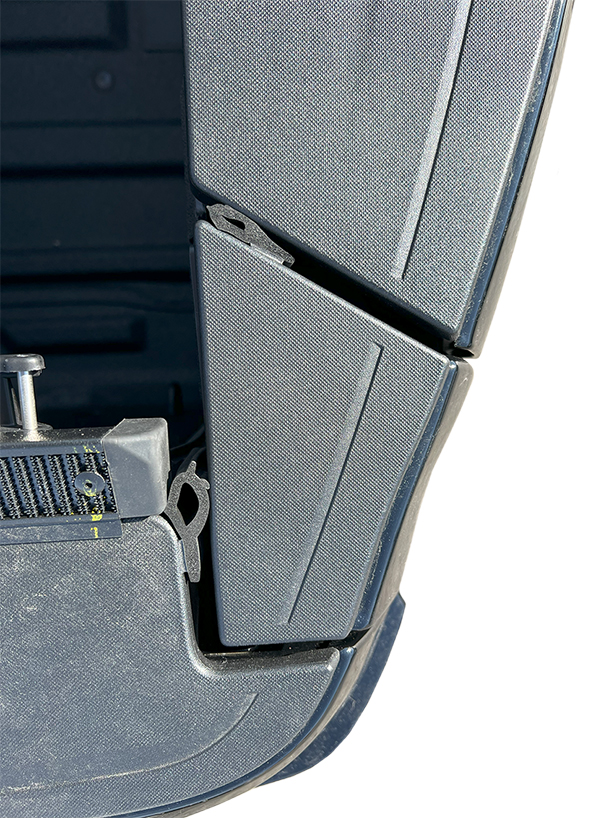
STEP 4: ATTACHING STANDARD SEAL TO LEFT SIDEWALL OF MIDGATE NOTE: The adhesion promote will create an instant bond so do not attempt to remove or reposition. Peel off liner from 9.5” (24.13cm) piece of Standard seal. Attach near the bottom of sidewall and with bulb side facing to the right. (FIG 4A and 4B). When nearing top of sidewall, gradually rotate seal 90° counterclockwise so that bulb is facing inward (FIG 4B). Duplicate for right side. Close midgate. If you see light through either sidewall, make adjustments by removing seal and repositioning. Do not attempt to remove or reposition seal (at top of midgate) where adhesion promoter was applied. Once seal is positioned apply very firm pressure (25lbs.) to secure adhesive bond. |
![]() |
|||
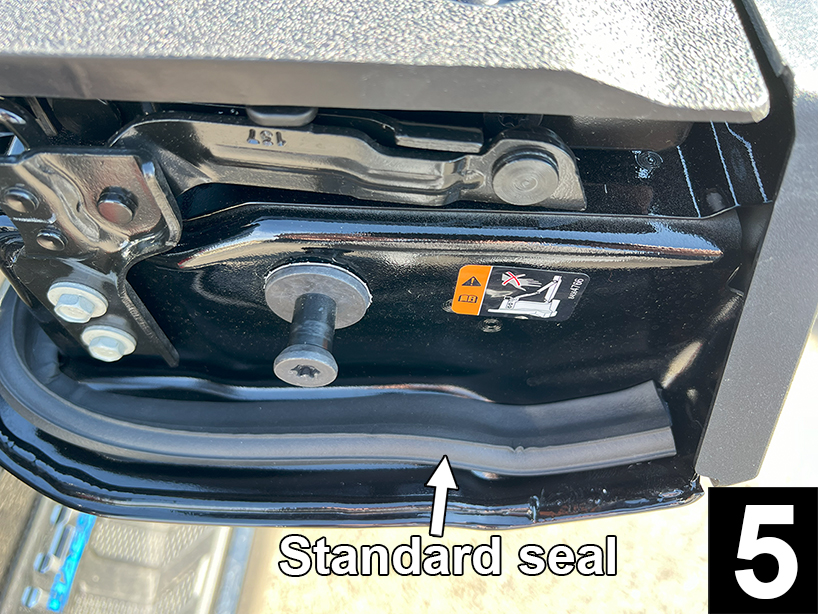
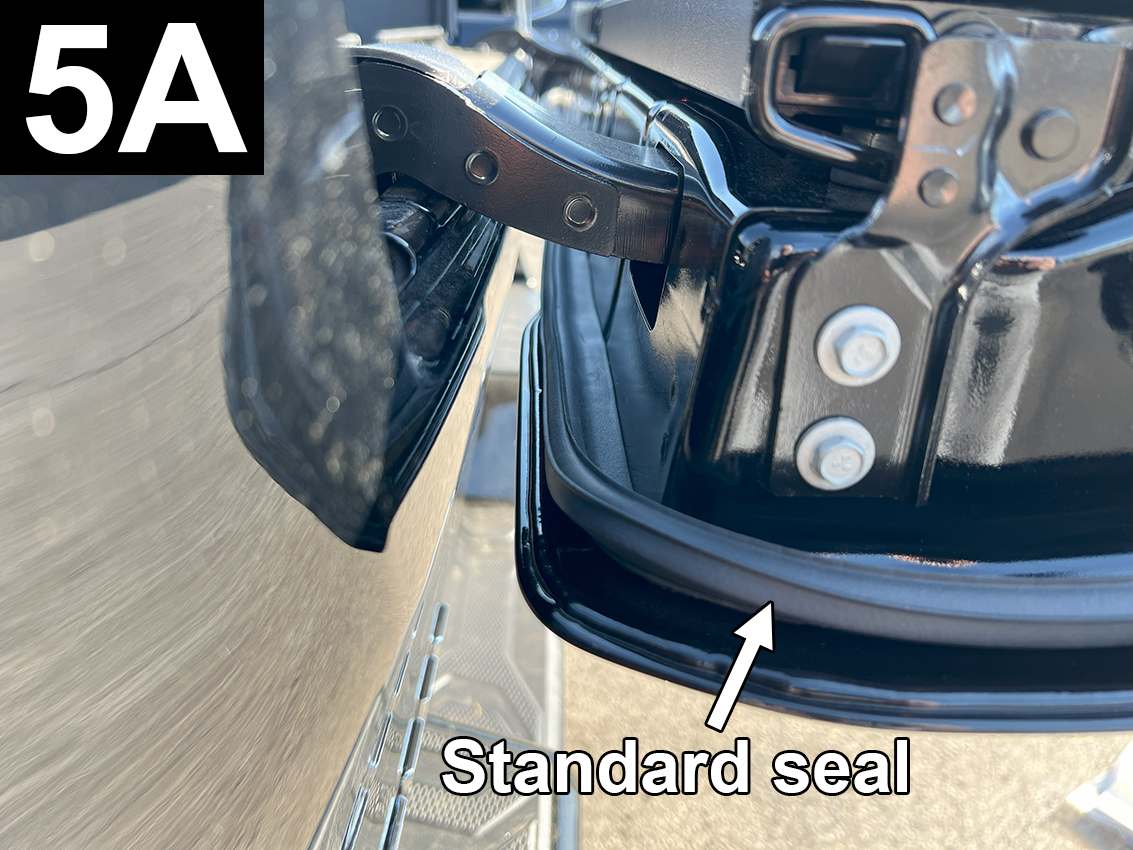
| STEP 5: ATTACHING TO BOTTOM PERIMETER OF MIDGATE USING STANDARD SEAL Open midgate. Peel back a section of liner and begin attaching Standard seal, with bulb side facing outwards and flat edge of seal flush to the inside corner of midgate (FIG 5). Attach in sections and apply light pressure to adhesive. Gradually round corner (slight ripples will exist at the corners and will not affect performance) and attach for entire horizontal length (FIG 5A). Gradually round corner on the other side and cut to fit. Once seal is positioned apply very firm pressure (25lbs.) to secure adhesive bond. |
![]() |
|||
![]() |
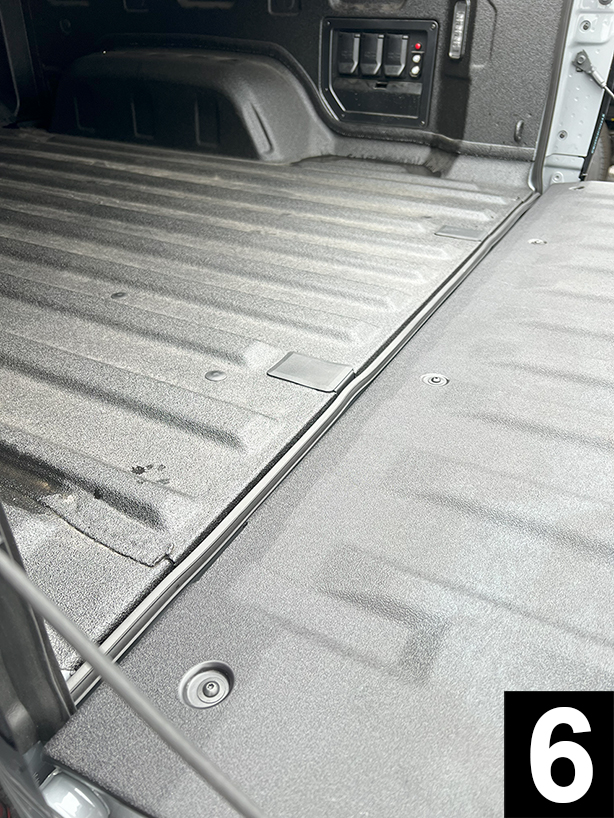
STEP 6: ATTACHING TO MAIN TAILGATE BOTTOM GAP USING STANDARD SEAL Start at either end. Peel back a section of liner and position bulb side up and flush to Large seal on the sidewall (FIG 2 and 6). Align adhesive just below the lower lip of truck bed floor. Attach in sections and apply light pressure to adhesive. Stop when 6" (15.3cm) from opposite end. Keeping adhesive off surface, cut seal where it will be flush with the Large seal. Continue attaching. After seal is in place, apply very firm pressure (25lbs.) to secure the entire adhesive bond. |
|||
| STEP 7: LEAVE TAILGATE OPEN FOR 60 MINUTES If the air temperature will fall between 50°F (10°C) within the next 24 hours or, if seals are attached to a surface other than paint, then leave tailgate(s) open for 24 hours. |
||||
|
||||
| Top left view of closed tailgate | ||||